Applications
 Breadcrumb: Home > Applications > Semiconductor Cleanroom
 Updated:2026-11-02
 Views:
Defects in coating and adhesive bonding often do not come from the spray gun or the glue but from something the substrate picked up in an earlier step: an invisible mold-release film, fibers dropped into a tool, a handprint smeared by a glove. Under ordinary overhead lighting none of it shows, and it surfaces after curing as craters, fish eyes, and poor adhesion. This article covers the two lighting angles, how to choose among the G, W, and Y light colors, and a six-step field routine, with illuminance figures for the LUYOR-3360G at 40 cm.
Many defects in coating and adhesive bonding are not the fault of the spray gun or the glue. The substrate arrived from an earlier step already carrying something: a layer of mold-release agent you cannot see, a few fibers that fell into the tool, a handprint wiped across the surface by a glove. Under ordinary shop lighting these traces barely show. They surface after the paint is applied and cured, as craters, fish eyes, and poor adhesion - and by then the cost of rework is already tens of times the cost of inspection.
A published field article on surface-inspection flashlights makes the point directly: the value of an inspection flashlight is that it turns "clean" from a feeling into something you can see, and it does so without a darkroom and without a dedicated UV station, so it can be inserted into an existing line. This article applies that reasoning to the LUYOR-3360G: why yellow-green light reveals oil and fibers, which angle suits which contaminant, how to choose between the G, W, and Y versions, and how to keep a record of the result.
It is not that the lamps are too dim. It is that contrast is too low. A white overhead lamp throws a large area of reflected light across the part, and the brightness difference between dust, fiber, and substrate is buried in that reflection. White light also contains every color, so color differences interfere with judgment - a speck of dust looks less different from the substrate than it really is.
The human eye is relatively sensitive to yellow-green light near 550 nm, which is the band the G version of the 3360G (500-600 nm) occupies. The job of narrow-band monochromatic light is to flatten color differences and leave brightness differences alone: the edges of particles and fibers form a clear light-dark boundary against the substrate, and fuzz just a few micrometers across becomes visible. Monochromatic light is also easy on the eyes, so an inspector does not tire over several hours of continuous use - which matters more in a line takt than one might expect.
Its division of labor with UV is equally clear: UV works by fluorescence and needs the target itself to emit (oils, adhesives, some additives), while yellow-green light works by scatter and reflection contrast and does not require the contaminant to fluoresce. Inert particles such as inorganic dust, glass fiber, and metal chips often look black under 365 nm and are clear under yellow-green light.
| Light source | Observation mechanism | Easy to see | Not visible | Typical use |
|---|---|---|---|---|
| White 400-760 nm | Diffuse reflection plus color difference | Large particles, obvious stains, color variation | Transparent oil film, fine fibers | Routine appearance inspection |
| Yellow-green 500-600 nm | Narrow band, brightness contrast | Dust, fiber, fuzz, oil film, handprints, pooled release agent | Extremely thin residue of clear liquid, internal defects | Pre-paint cleanliness, tool and composite inspection |
| UV 365 nm | Fluorescence excitation | Oil, adhesive, fluorescent additive residue | Non-fluorescent inert particles | Oil residue, cleaning validation |
The source article offers two field rules well worth writing straight into a work instruction: hold the flashlight at 90° to the surface (perpendicular) and oil and handprints become obvious at a glance; bring the light down to close to 180° so the beam grazes the surface and fibers and dust stand out more. The mechanism is not complicated - under perpendicular illumination the oil film forms a specular reflection that differs in brightness from the dry area around it, while under grazing light particles and fibers cast long shadows that magnify their apparent size.
| Angle | Beam-to-surface angle | Spot and distance | Main target | Criterion | Cautions |
|---|---|---|---|---|---|
| Perpendicular | About 90° | Spot narrowed to 5-10 cm, distance 30-40 cm | Oil film, handprints, pooled release agent, water marks | Continuous sheen, rainbow pattern, or a sharply bounded fingerprint | Keep your own shadow and fixture shadows out of the view |
| Grazing | Close to 180°, beam along the surface | Widened to a 20-50 cm spot | Fibers, dust, fuzz, scratch edges | A shadow or bright point that stays in place when the angle changes | View from the same side as the light, with the eye low |
| 45° side light | About 45° | Medium spot | Scratches, pits, orange peel | Light-dark boundary moves with the angle | Suits re-inspection of coated surfaces |
Fixing the three angles into a routine helps: begin with a grazing sweep of the whole area to find anything unusual in surface form, then use perpendicular light to judge whether it is oil-based, and finish with a 45° pass on coated parts to look for surface defects. Changing the angle is what separates real from false: a real particle stays where it is and its shadow direction alone changes, while glare and dust on the lens move with the light.
The LUYOR-3360G series has three versions that differ in dominant wavelength; body and battery are shared:
| Model | Dominant band | Suited to | Less suited to |
|---|---|---|---|
| 3360G | 500-600 nm yellow-green | Pre-paint cleanliness, tools, composite layup and bond surfaces, fibers and oil | Color-matching work that needs hue judgment |
| 3360W | 400-760 nm white | Cases where color and appearance must be judged together | Long continuous sweeps, where eye fatigue sets in |
| 3360Y | 530-670 nm yellow | Yellow-light areas (photoresist and similar), wafer and photosensitive material environments | Pre-paint inspection, where contrast is weaker than with G |
For coating, injection molding, and composites, G is enough. The flashlight described in the source article uses a built-in green filter to improve visibility, and a yellow-green flashlight takes the same route: trade color rendering for contrast. If one station has to check cleanliness and judge color, equip a G and a W rather than expecting one lamp to do both.
The 3360G uses a two-stage lens zoom, and the spot can be narrowed from 50 cm down to 5 cm. The price of zooming is that illuminance falls quickly as the spot widens, which determines how it should be used:
| Spot diameter (at 40 cm) | 3360G illuminance | 3360W illuminance | 3360Y illuminance | Suited action |
|---|---|---|---|---|
| 5 cm | about 280,000 lux | about 130,000 lux | about 70,000 lux | Re-checking a suspect point, fine reading of a small area |
| 10 cm | about 55,000 lux | about 45,000 lux | about 30,000 lux | Routine point finding at a 30-40 cm working distance |
| 50 cm | about 4000 lux | about 3000 lux | about 2000 lux | Fast sweep of a large area |
Cleanliness inspection depends on contrast rather than on an absolute illuminance figure, so the 4000 lux sweep setting is still adequate in a dimmed area. But do not make the call on the 50 cm spot: treat the wide spot as a search setting, and when something looks suspicious narrow back to a 5-10 cm spot before judging. The product page notes this as well.
Inspection becomes repeatable once the content above is fixed into actions:
| Step | Action | Parameters | Output |
|---|---|---|---|
| 1 Establish a baseline | Begin by lighting a known-clean part of the same type and memorizing what "clean" looks like | One pass perpendicular, one grazing | Baseline photo of the station |
| 2 Control ambient light | Switch off the overhead lamp directly above or add a shield; no darkroom needed | Lower ambient illuminance is better | - |
| 3 Sweep in one direction | Left to right, top to bottom, with about one third spot overlap, without rubbing back and forth | 20-50 cm wide spot | Locations of suspect points |
| 4 Change angle and read | Grazing for surface form, perpendicular to judge oil; confirm when both agree | 5-10 cm spot | Contaminant category |
| 5 Act | Choose the cleaning method by category: solvent wipe, tack cloth, blow-off, rework | - | Corrective action |
| 6 Re-check and record | Light the same place at the same angle after treatment | Same as step 1 | Photo plus conclusion |
The word "one direction" in step 3 is not formalism. The usual mistake with back-and-forth wiping is that the forward stroke pushes a particle of dust into an area that has not been checked yet, and the return stroke brings it back - after which nobody can say where it actually was.
The source article describes how this lamp is used at several European manufacturers, and on a shop floor elsewhere the logic is the same:
One, before release agent is applied to a tool. The source describes a British high-end sports car maker and a Formula One team using the lamp to monitor tool cleanliness before release agent is applied to composite parts, so that no dust or particle leaves a mark on the part surface or affects the part standard. The places to check are usually the parting line, cavity corners, ejector pin locations, and vent grooves - these four accumulate dust and release-agent residue far more readily than flat surfaces.
Second, before painting molded parts. The source describes a large European tier-one plastics supplier making this check mandatory across the whole production cycle. A mandatory check survives if it has trigger points, otherwise the takt will squeeze it out. Three are worth setting: the opening part of each shift, the opening part after a color or material change, and the opening part after a line stop of more than 4 hours.
Third, before composite layup and bonding. Two classes of contaminant matter here: release-agent residue and loose fiber. The former leaves a bond surface that looks clean but does not stick; the latter forms a weak boundary directly. A grazing sweep of the layup area followed by perpendicular light to judge oil film is far cheaper than finding out with a peel test afterwards.
| Situation | Must-check locations | Priority contaminants | Trigger |
|---|---|---|---|
| Before release agent on a tool | Parting line, cavity corners, ejector pins, vent grooves | Accumulated dust, old release-agent residue, fiber | Before every application |
| Before painting molded parts | Appearance surfaces, edges and corners, mating faces | Handprints, oil, dust, fuzz | Opening part of the shift, color or material change, restart after a stop |
| Before composite layup and bonding | Layup area, bond surface, tool corners | Release-agent residue, loose fiber | After each ply, before adhesive |
| Re-inspection after coating | Whole surface | Craters, fish eyes, raised particles | Sampling at end of line |
Yellow-green light shows the shape, UV shows the nature, and neither replaces the other. Yellow-green light is good at revealing the position and boundary of particles, fibers, and oil film, but it does not tell you what that film is. UV fluorescence can confirm oil, adhesive, and cleaning-agent residue, but it cannot help with inorganic particles.
The recommended two-step method: sweep the whole surface with 3360G yellow-green light and mark the suspect points, then light the same locations with a LUYOR-2130L UV flashlight or an MNT-365A. What lights up is oil or adhesive; what stays dark is an inert particle. Where cleaning validation and quantitative evidence are needed, see the selection guidance in the 365 nm blacklight section and two field articles: checking particle residue on semiconductor equipment after cleaning and particle detection in semiconductor cleanrooms.
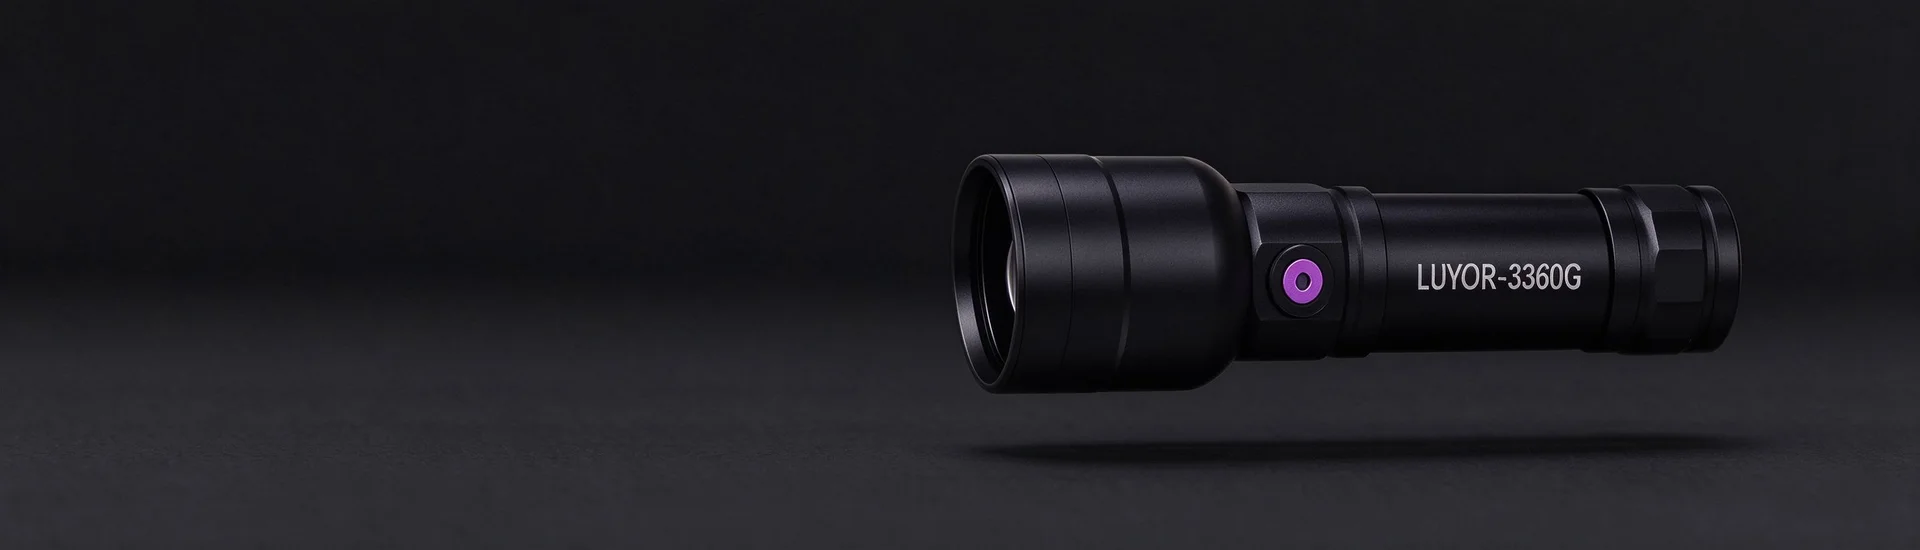
The 3360G is a hard-anodized aluminum alloy body with stainless steel parts, supplied with a 5000 mAh battery, 3-4 hours of runtime, and 5-6 hours of charging. Two batteries come in the box so they can be rotated without waiting on a charge during a shift. Head diameter is 52 mm, body length 160 mm, weight 340 g - light enough to hold one-handed for a minute or two without strain. Working temperature is 0-40 ℃, and it stores in an aluminum case.
Maintenance comes down to a few points: wipe the lens one way with absolute ethanol and lens paper, never in circles and never dry with a tissue, which leaves scratches and spoils spot uniformity; do not touch the lens with your fingers; stop turning the zoom mechanism at the end of its travel instead of forcing it; and store batteries at about half charge rather than leaving them full or empty in the case for a quarter.
Inspection can be traced when there is a form to fill in. The table below can be merged directly into an inspection document:
| Item | Frequency | Tool | Criterion | Record |
|---|---|---|---|---|
| Appearance-surface cleanliness | Opening part of each shift | 3360G, grazing plus perpendicular | No visible fiber, no oil-film sheen, particle size and count within limits | Photo plus location markup |
| Tool cavity cleanliness | Before each release-agent application | 3360G, 5-10 cm spot | No residue or accumulated dust at corners and ejector pins | Inspector signature |
| Bond-surface cleanliness | Before adhesive application | 3360G plus UV flashlight | No particles under yellow-green light, no fluorescent residue under UV | Both items checked |
| Defects after coating | Sampling at end of line | 3360G, 45° side light | No craters, fish eyes, or raised particles | Defect type and count |
| Instrument condition | Weekly | Visual | Lens free of scratches, spot free of dark patches, battery normal | Check sheet |
Do not copy someone else's limits. An appearance surface might be set as "no visible particle permitted" while an inner surface is relaxed to "no more than 3 below 0.5 mm"; the actual numbers have to be derived from your customer standard and your own defect history - count the current state for two weeks, then set thresholds, or the form will not survive in use.
The hard part of surface cleanliness has never been how to look at it, but whether looking at it has been made routine. A yellow-green flashlight solves the seeing; a procedure solves the seeing it every time. Neither works without the other.
Full specifications for the LUYOR-3360G, a comparison of the three light colors, and the standard accessory list are on the product page. Where a fixed station and free hands are needed, consider the bench model LUYOR-3318 series; for whole-surface scanning of wafers and large panels, the LUYOR-3325G is a better fit. The surface inspection lamp section compares the division of labor between the three. To put the inspection actions and limits onto your own line, send over the part material, the contaminant source, and your takt, and the angles, distances, and criteria can be worked out together.
This article belongs to the semiconductor cleanroom section.
Other sections on the same product line include surface inspection lamps (low-angle side light that pulls particles, scratches, and handprints out of the background) and 365 nm blacklights (UV area sources for penetrant testing, leak detection, and fluorescence inspection, specified by irradiance rather than wattage).
Models mentioned: LUYOR-3360G, LUYOR-2130L, MNT-365A. Ranges, accuracy, and accessory lists for each model are given on the product pages.

Email: info@xinysun.com

Tel: 131-2093-6518

Address: 1525 Minqiang Road, Bldg 26, Songjiang, Shanghai

Copyright 2026 Xinysun Instrument (Shanghai) Co., Ltd. All rights reserved.
ICP:ICP-2026046447




 Industrial Test Instruments


